
Product Photoshoot generates studio-quality product photography and lifestyle shots with AI — no camera or studio needed. Open it from AI Designer → Apps → Product Photoshoot.
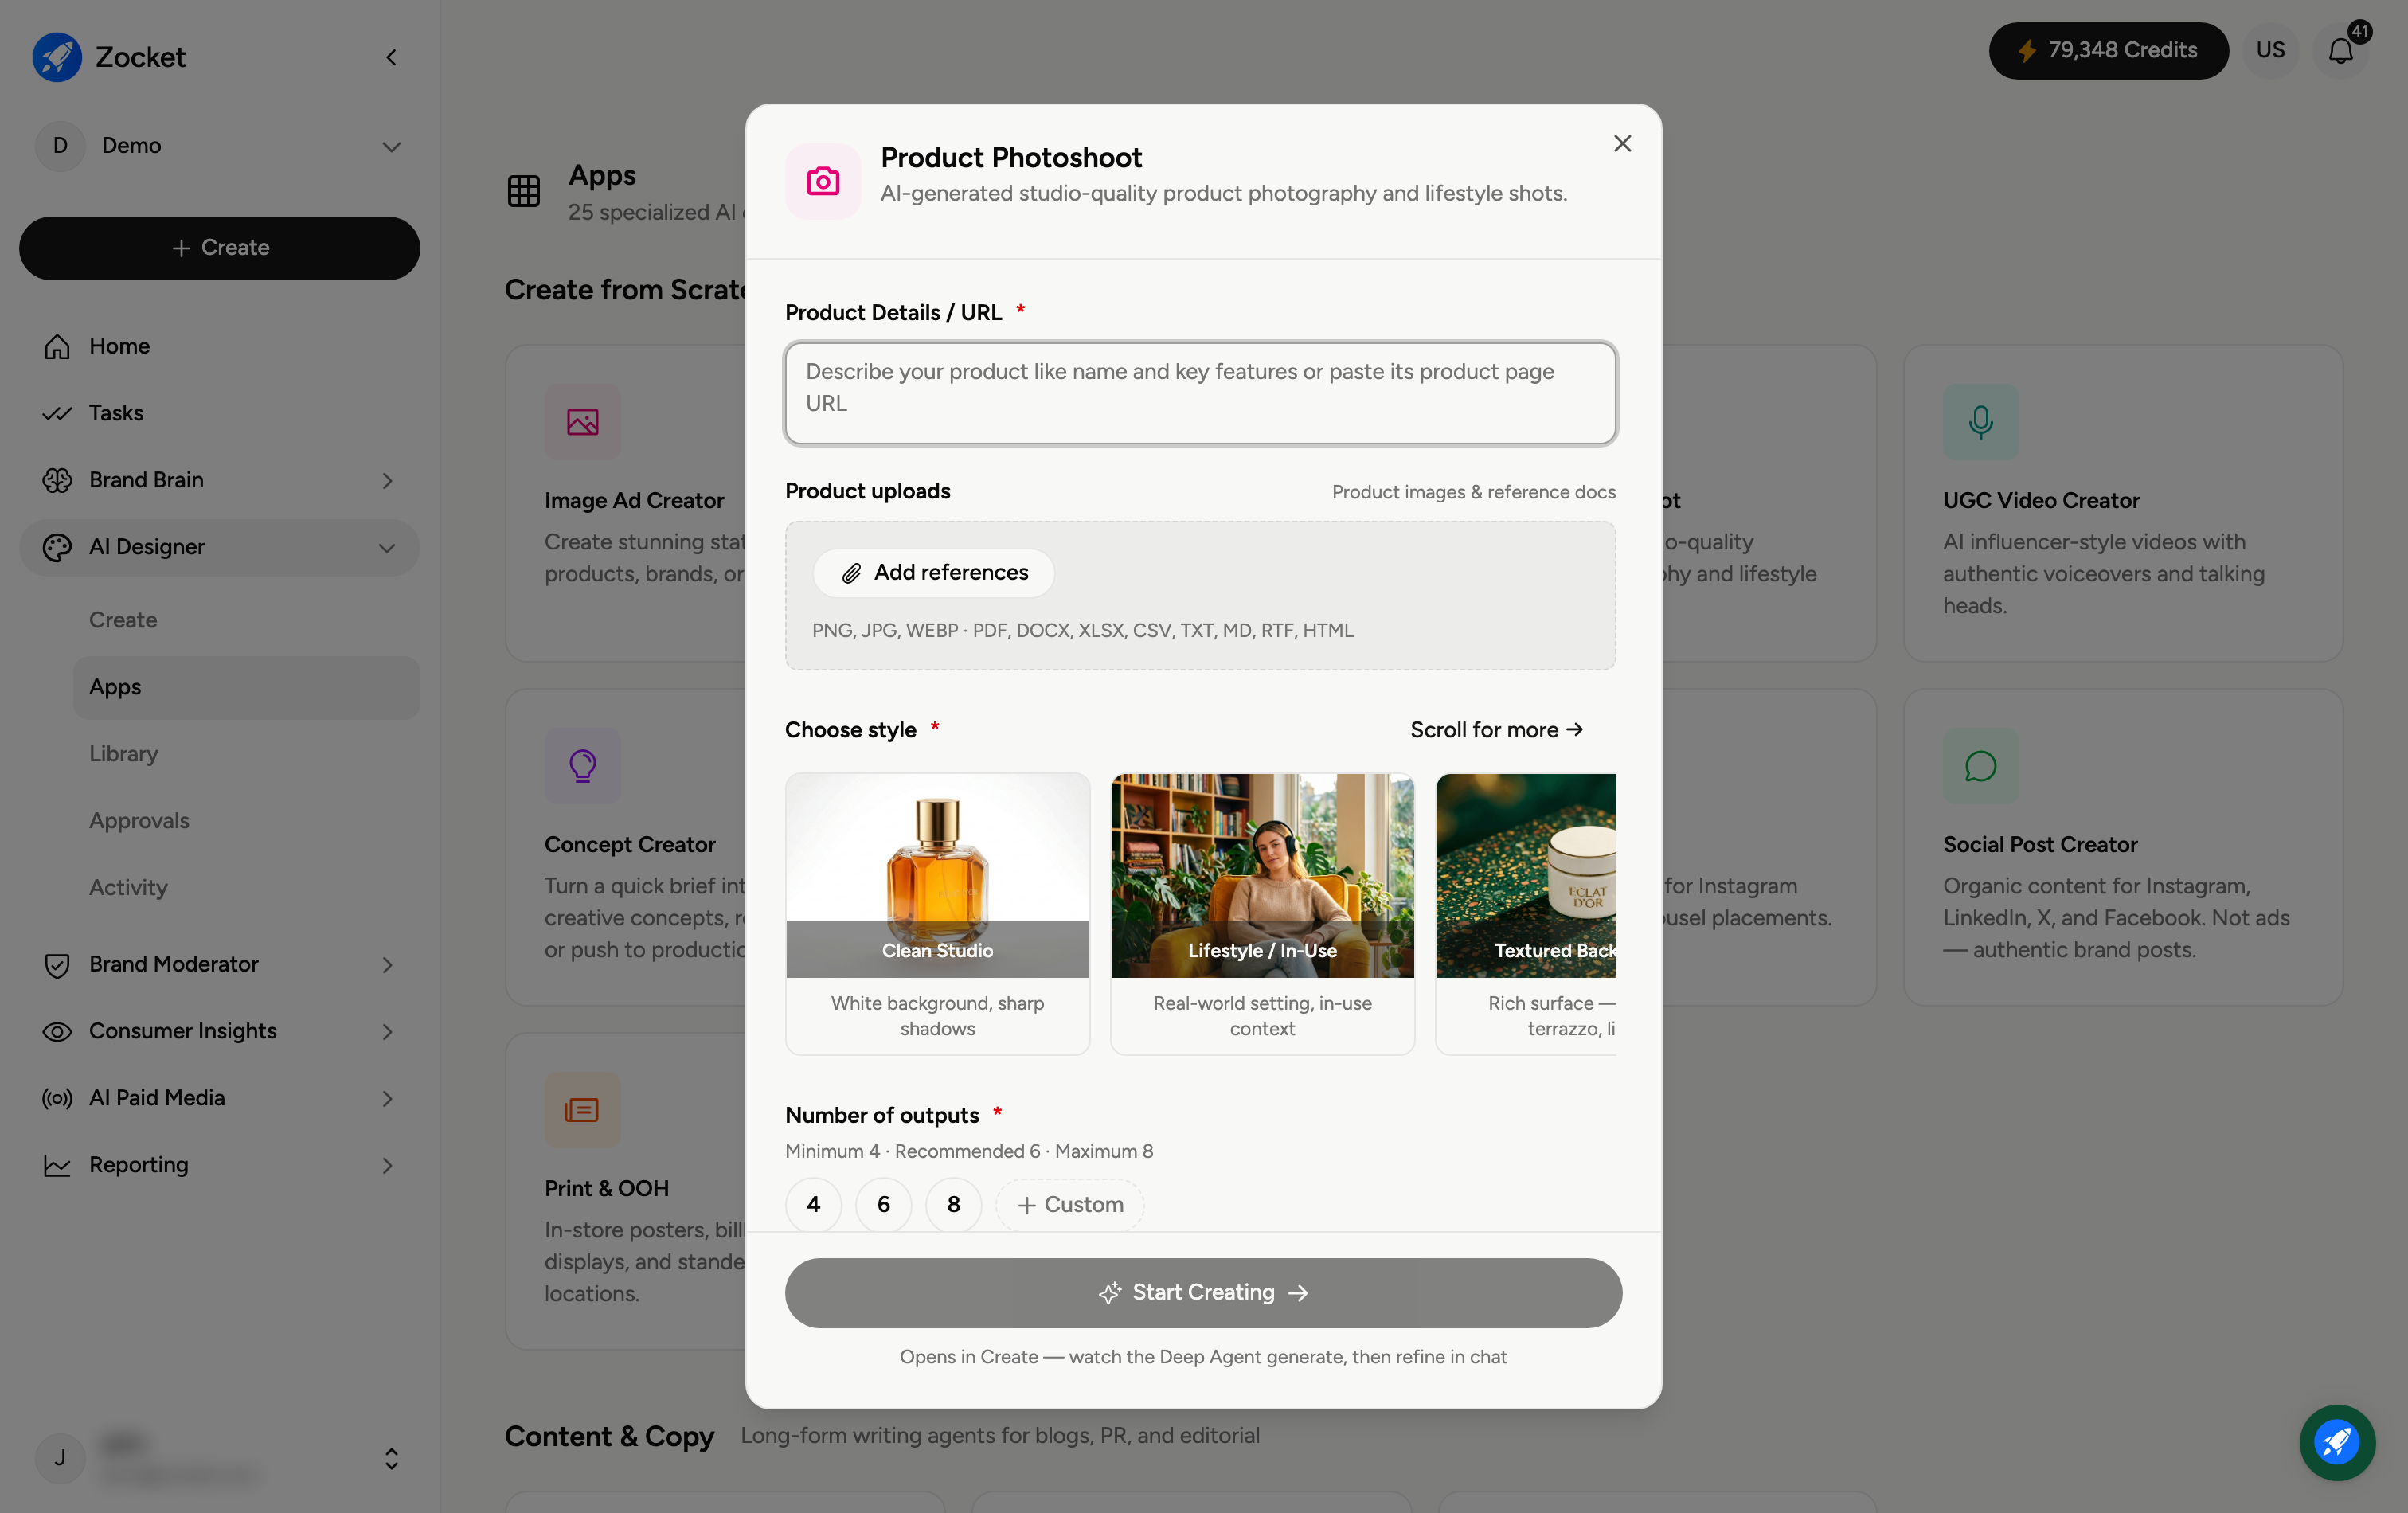
Step 1 — Describe your product
In Product Details / URL (required), describe your product or paste its product page URL. For a photoshoot, Add references is especially useful — upload a clear photo of the actual product so the AI reproduces it accurately (PNG, JPG, WEBP, PDF, DOCX, XLSX, CSV, TXT, MD, RTF, HTML).
Step 2 — Choose a style and how many shots
Under Choose style (required), pick the look you want — for example Clean Studio (white background, sharp shadows), Lifestyle / In-Use (real-world setting), or Textured Background (rich surfaces like terrazzo). Use Scroll for more to see additional styles. Then set Number of outputs (4, 6, or 8; minimum 4, recommended 6, maximum 8).
Step 3 — Start creating
Click Start Creating. It opens in Create, where you watch the shots generate and then refine them in chat — ask for a different angle, background, or lighting. Finished images are saved to your Library.
Frequently Asked Questions
Do I need to upload a photo of my product?
It's strongly recommended. A clear reference photo lets the AI keep your product accurate; without one it works from your description alone.
When should I use Clean Studio rather than Lifestyle?
Clean Studio is best for catalogue and marketplace shots (product on white). Lifestyle / In-Use shows the product in a real setting, which is better for ads and social.
How is this different from Image Ad Creator?
Product Photoshoot focuses on photography of the product itself (clean or lifestyle shots). Image Ad Creator builds full ads with text and layout around it.
Can I get more style options?
Yes — use Scroll for more in the Choose style row to see additional looks beyond the first few.
Where do the shots go?
They're saved to your Library (AI Designer → Library) for reuse or download.