
Concept Creator turns a quick brief into multiple creative concepts — different directions you can compare, refine, or push straight to production. It's the ideal starting point when you're still exploring ideas. Open it from AI Designer → Apps → Concept Creator.
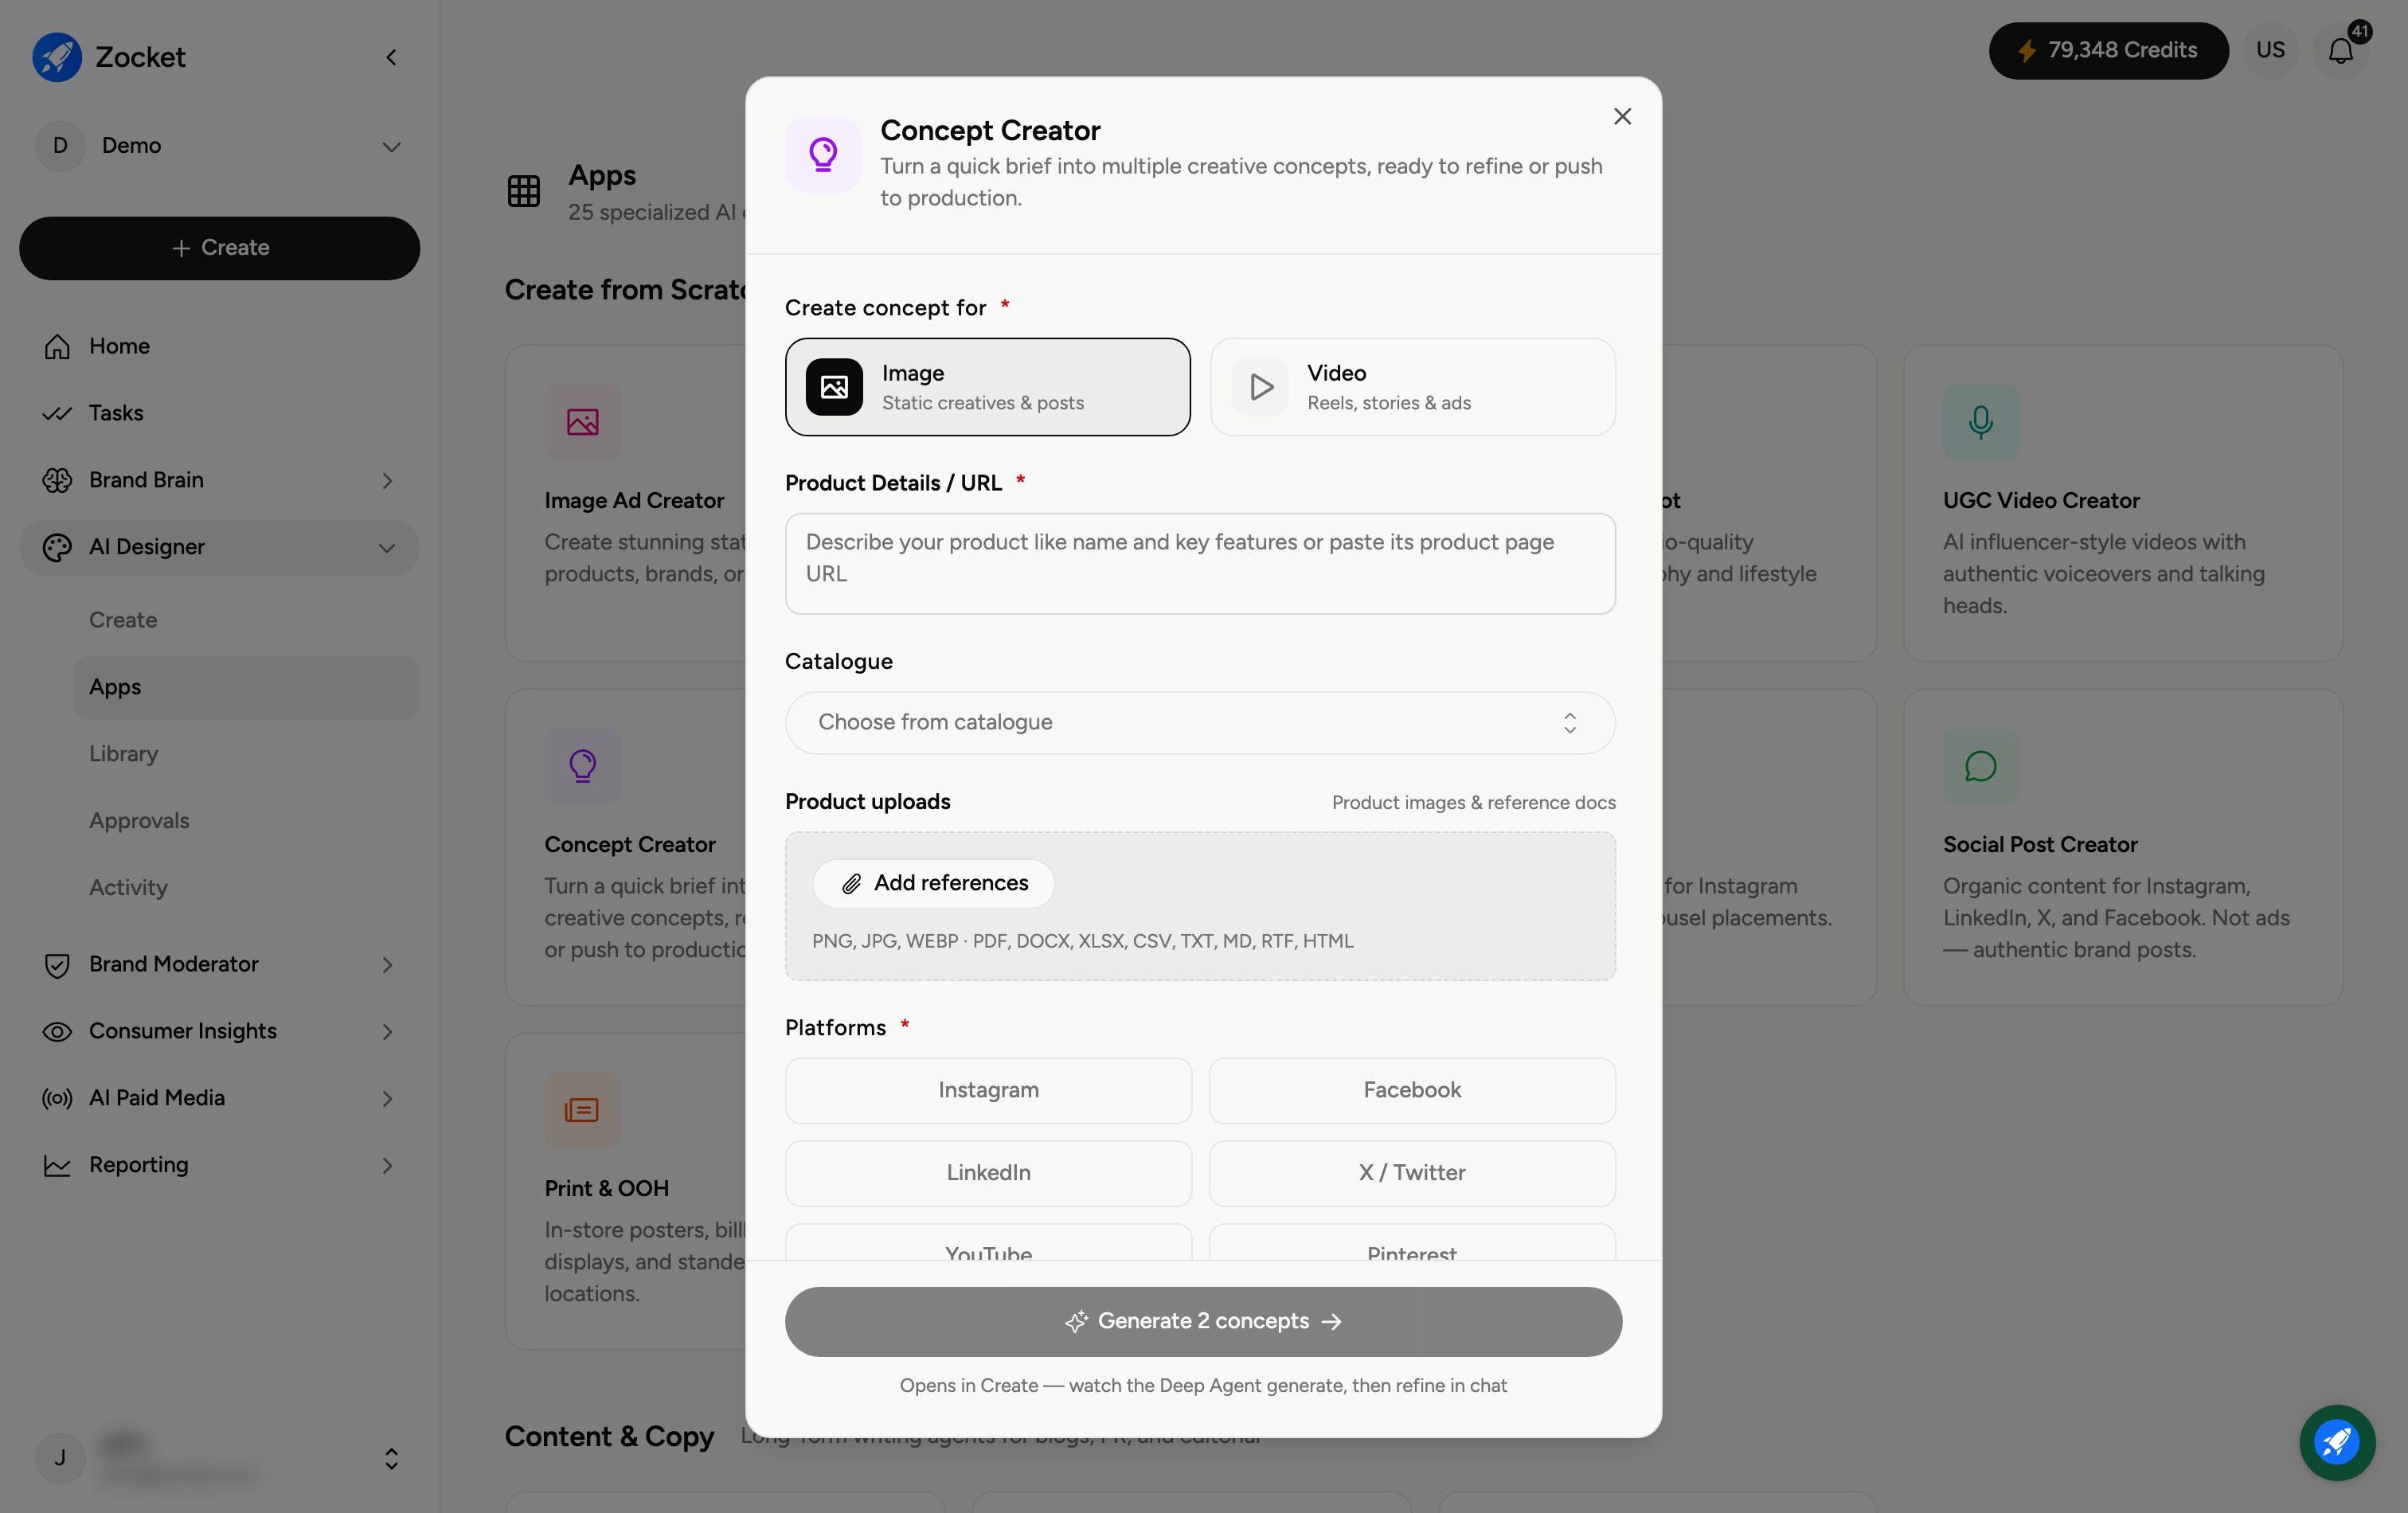
Step 1 — Set up your concept
Create concept for (required) — choose Image (static creatives and posts) or Video (reels, stories and ads).
Product Details / URL (required) — describe your product or paste its URL.
Catalogue — or pick an existing product straight from your catalogue instead of typing it.
Product uploads — Add references (images or docs) for accuracy.
Step 2 — Choose platforms
Under Platforms (required), pick where the concepts are for — Instagram, Facebook, LinkedIn, X / Twitter, YouTube, or Pinterest — so each concept is shaped for that channel.
Step 3 — Generate concepts
Click Generate concepts. It opens in Create, where the agent produces a set of distinct concepts. Refine them in chat, then push the winning concept to production — into Video Ad Creator for video, or one of the image creators for static work. The button label shows how many concepts you'll get.
Frequently Asked Questions
When should I use Concept Creator instead of Image or Video Ad Creator?
Use it early, when you want to explore several directions before committing. Once you like a concept, push it into a specific creator to produce the finished asset.
What does "push to production" mean?
Taking a chosen concept and turning it into a finished creative — for example, generating the full image ad or building the video from that concept.
What's the Catalogue option?
If your products are already in Zocket, pick one from the Catalogue dropdown instead of describing it — faster and more accurate.
Can I make concepts for both image and video?
Choose one per run using Create concept for. Run it again with the other option if you want both.
Where do the concepts live?
They open in Create and are saved with your session; finished assets land in your Library.